To use a Ryobi table saw, first make sure that the saw is properly assembled and all safety guards are in place. Next, align the blade with the desired cut line and position the workpiece on the table. To start the saw, squeeze the trigger and slowly guide the blade through the material.
Be sure to keep your hands clear of the blade at all times and never force the saw through tough materials. When finished, release the trigger and wait for the blade to come to a complete stop before moving or removing any materials.
- Read the instruction manual that came with your Ryobi table saw before using it
- Inspect your table saw for any damage before each use
- Make sure the blade is properly secured and aligned before turning on the table saw
- Place your workpiece on thetable saw’s surface, making sure it is firmly secured in place
- Use the rip fence to guide your cut along the length of your workpiece, then slowly and carefully push the workpiece through the blade until it is fully cut through
- Turn offthe table saw and unplug it from its power source before removing your workpiece from the surface or making any adjustments tothe blade or other parts of thesaw
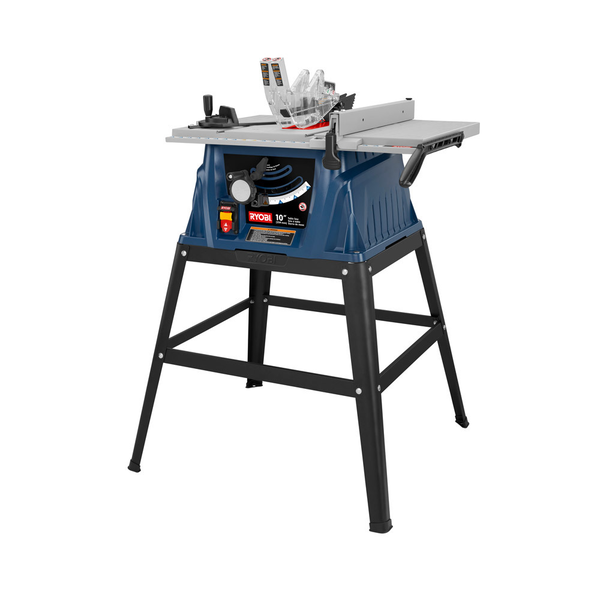
How To Set Up Your New Ryobi Portable Table Saw
How to Use a Ryobi Saw
If you’re looking for a powerful and versatile saw, the Ryobi saw is a great option. With its ability to cut through a variety of materials, the Ryobi saw can handle any project you throw at it. Here’s how to use a Ryobi saw for all your cutting needs.
To start, you’ll need to gather some supplies. In addition to the saw itself, you’ll need a blade (or blades) that is appropriate for the material you’re cutting. You’ll also need something to support the workpiece while you’re cutting it.
This could be a sawhorse, table, or other sturdy surface. Once you have your supplies gathered, it’s time to get started.
First, set up your work area and make sure everything is level and stable.
Then, align the blade of the saw with your mark on the material you’re going to cut. When cutting lumber, it’s important to use a sharp blade and make sure your cuts are straight; otherwise, the piece may not fit together properly later on.
Once your blade is in place, hold down the trigger and slowly guide the blade through the material.
Be careful not to force it; let the weight of the saw do most of the work. If you’re making long cuts, be sure to take breaks so that your arms don’t get too tired—it’s easy to lose control of the saw when you’re fatigued.
When you’re finished making your cuts, release the trigger and let the blade come to a complete stop before moving anything else.
Credit: www.ryobitools.com
How Do I Set Up My Ryobi Table Saw
Assuming you would like a step-by-step guide on how to set up a Ryobi table saw:
1. Start by reading the instruction manual that came with the saw. This will give you an overview of all the parts of the saw and how they fit together.
2. Next, find a flat surface to set up your saw on. You will need to make sure that the surface is level so that your cuts are accurate.
3. Once you have found a suitable location, begin assembling the stand according to the instructions in the manual.
4. Once the stand is assembled, attach the saw to it according to the instructions in the manual. Make sure that all connections are tight and secure before moving on.
5. The next step is to install the blade onto the saw.
Again, consult your instruction manual for specific details on how to do this properly and securely.
6. With the blade installed, you can now plug in your saw and turn it on.
What are the Basic Steps for Using a Ryobi Table Saw
If you’re looking to tackle a woodworking project, one of the first things you’ll need is a Ryobi table saw. In this post, we’ll walk you through the basic steps for using this type of saw so that you can get started on your project.
First, make sure that the blade guard is in place and that the blade is properly secured.
Then, align the fence with the blade and adjust it to the desired width. Next, set the depth of cut by adjusting the bevel knob. Finally, turn on the saw and make your cut.
When you’re finished cutting, be sure to turn off the power and unplug the saw. Then, remove any debris from the table and blade before storing away your saw.
How Do I Make Accurate Cuts With My Ryobi Table Saw
If you’re looking for tips on how to make accurate cuts with your Ryobi table saw, here are a few things to keep in mind.
First, be sure to use a sharp blade. A dull blade will not only make it harder to get a clean cut, but it can also cause the wood to splinter or tear.
Second, when setting up your table saw for a cut, be sure to measure twice and cut once. In other words, take your time in measuring the piece of wood you’ll be cutting and don’t rush the actual cutting process.
Third, use a fence when making rip cuts (cuts that run parallel to the grain of the wood).
A fence will help guide the board through the blade and help ensure a straighter, more accurate cut.
Finally, avoid using too much pressure when feeding the wood through the blade. Just let the weight of the board do its job – putting too much pressure on it can cause it to bind up in the blade or kick back at you.
By following these tips, you should be able to make more accurate cuts with your Ryobi table saw.
What are Some Tips for Getting the Most Out of My Ryobi Table Saw
There are a few things you can do to get the most out of your Ryobi table saw. First, make sure you have the right blade for the job. Second, use a push stick or other device to keep your fingers away from the blade.
Third, use a fence and miter gauge to help make accurate cuts. Finally, take your time and be careful when using the saw.
Conclusion
If you’re looking for a table saw that’s easy to use and set up, Ryobi has got you covered. With their new line of table saws, they’ve made it easier than ever to get started with woodworking. In this blog post, we’ll show you how to use a Ryobi table saw so that you can start your next project with ease.